Angry bird bomber hat

Notes:
*whenever you do applique or specialty work try to use the smallest tapestry hook possible for all weaving and sewing for a neater look
*for a seamless look on your hat follow one of the seamless methods found here
Materials:
4.0mm hook for appliques
5.0mm hook for hat
Vanna’s choice yarn in yellow or gold, white, black, grey and cranberry
or any worsted weight (Red Heart is a good inexpensive alternative) in the same colors
embroidery needle for weaving in ends and attaching appliques
To cre8te the hat:
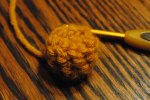
- Mc 6sc join with sl st, do not pull center tight
- 8sc around
- 8sc around
- 8sc around, pull up on loop to make larger and remove hook, turn piece inside out (you want the “wrong” side to show) and pull tail through center hole, pull tight and fasten off tail of mc (if you don’t do this now you won’t be able to get to it later)
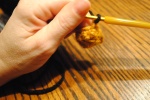
- Insert hook back into loop going the normal right way and sc once around <8> join with sl st and cut yarn long enough to change color and weave in later
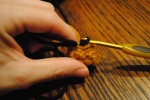
- Change color by picking up black yarn and pulling through yellow yarn, pull tail of yellow yarn tight so that only black yarn shows and hdc around <8> do not sl st to finish round yet * work over tails but leave out enough to weave them back in the opposite direction. At this point pull up on loop and lengthen, remove hook for easier working and weave yellow and black tails securely in opposite directions, be sure to pull tight enough so that no seem or step in row color shows. Sl st to join.

- Hdc around <8>
- Hdc around <8>
- Change hook to 5.0mm- [2hdc] around <16>
- Hdc around with [2hdc] in every 4th st <20>
- Hdc around with [2hdc] in every 2nd st <30>
- Hdc around with [2hdc] in every 3rd <40>
- Hdc around with [2hd] in every 8th st <45>
- Repeat for 8 more rows
- Change to grey
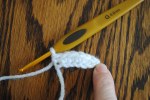
- 17 hdc around then in next st insert hook slightly above where next st would go and begin a double crochet, but do only pull hook through 1st two loops then insert back into hole and yarn over, pull through all loops on hook
- Use the same method for creating the rounded part on grey of hat, increasing the distance of where you insert your hook from edge, do the opposite on the other side for a total of 12 st
- 16hdc around to end
- 45hdc around
- Sl st around to finish
To cre8te the beak:
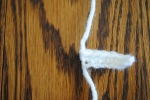
With white ch 7
Turn and st across 1sc in the next three, 1hdc in the next two, 1 dc in last <6> fasten off but leave ends, leave one longer tail (12” or so) for fastening
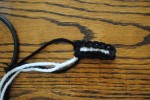
Loosely sl st around teeth with black, fasten off but do not weave in ends yet
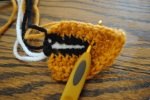
Using yellow/gold insert hook front to back into back loop of the last st you completed (top left hand corner, pick up new color and sc to end in back loop only, chain 4, and sc back <3> sc into last sc of previous row
Continue by sc across top of white row <6>
Turn and sc all the way to second to last st. sl st in last <9sc, 1sl st>
Turn and sk 1st st, sc across <9>
Turn and 6sc then sl st end <4>
Ch3 and sc back into 1st ch, 7hdc across top of beak, 1sc, 1sl st
Finish off. Leave long tail

*Beak point will be to right.
Insert hook into the point of the beak where the white and black meet the orange, surface sl st crochet to tip of beak. Fasten off and weave in ends
Weave in all other tails leaving one long orange tail and one long white tail for fastening to hat
To cre8te the eyes:
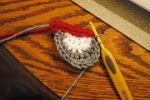
Starting with red for eyebrow ch 9, sc across <8> fasten off, leaving long tail
Starting at inner corner of eyebrow insert hook from back to front and pick up white- 5sc turn and 1sc, [2sc] in each of next two, 1sc, 1sl st, sl into same sp and fasten off leaving long tail. Weave in short end.
In inner corner where red meets white insert hook front to back and pick up grey. Sl st into red, turn and sc around white, 1sc in 1st, 1sc in next, [2sc] in each of next three, 1sc in next three and sl st into red. Turn and sl in next 6 sts, [2sc] in next 3st st to end, sl into eyebrow and fasten off. Weave in ends.
Repeat for second eye, but insert hook from front to back in the 6th space from corner to add white for a mirror effect
To cre8te pupil:
5sc in mc, fasten off and leave long tail, weave in short tail
Sew pupil to eye where all three colors meet in inner corner
Secure beak and eyes to hat… and you are done. Hope you enjoyed making this with me. If you have any questions please leave a comment below or feel free to email me at cre8tion@ymail.com. And as always
Have FUN and Happy Hookin’
If you like what you see share it !!! Pinterest, facebook google+ and more, links below:


